How to take good screenshots with Puppeteer?
Puppeteer can be used to take screenshots of a website. However, the screenshots may not look exactly as you expect:
- You may only see the top of the page and not the whole page;
- The screen resolution may be too small and may require scrolling horizontally to display certain elements;
- You may want to focus only on a subset of the page and take a screenshot of certain HTML elements .
How to take a screenshot by default with Puppeteer?
To take a screenshot with Puppeteer, you need to use the
page.screenshot function and provide the path where you want to save the
screenshot.
const puppeteer = require('puppeteer');

(async () => {
    const browser = await puppeteer.launch();
    const page = await browser.newPage();
    await page.goto('https://deviceandbrowserinfo.com/http_headers');

    await page.screenshot({ path: './test-screenshot.png' })
    await browser.close()
})();
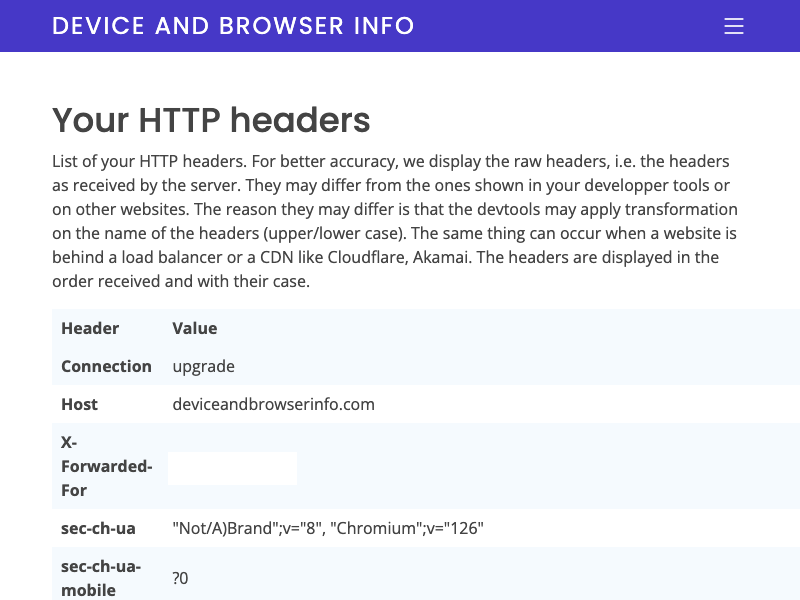
On https://deviceandbrowserinfo.com/http_headers, a page to visualize your HTTP headers, it may look as follows. You can notice that we don’t see the whole page, only the first HTTP headers are visible in the screenshot.
How to take a screenshot of the whole page with Puppeteer?
page.screenshot can be used with the
fullPage: true option to take a screenshot of the full page.
await page.screenshot({ path: './test-screenshot.png', fullPage: true })
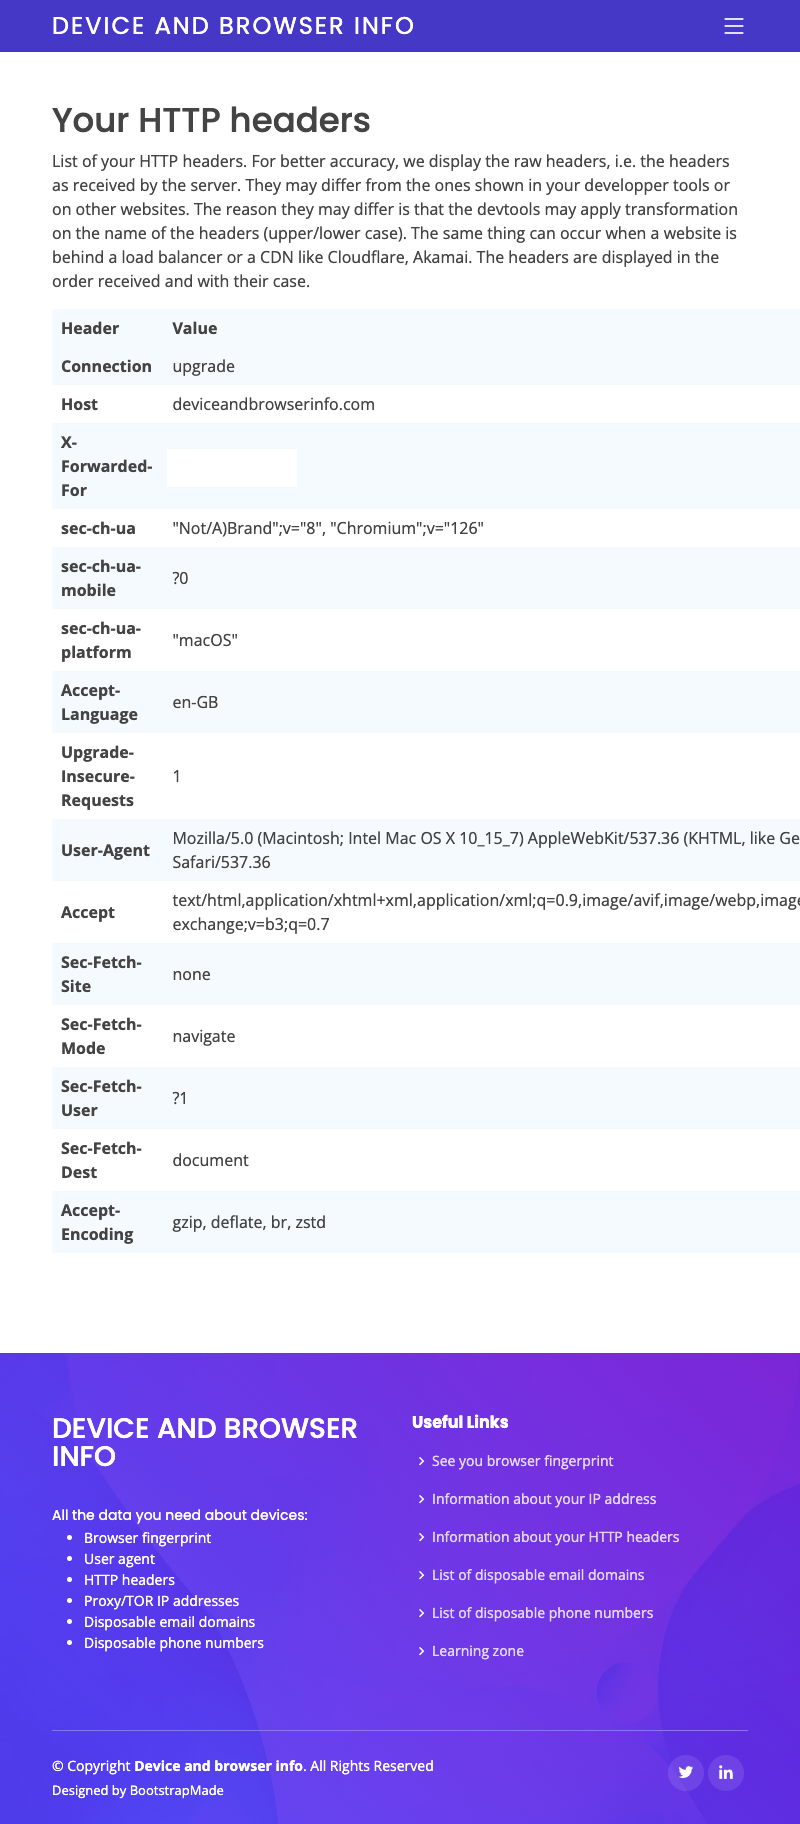
With fullPage: true , we obtain the result
below. It looks better, but it’s still not perfect since certain HTTP headers such as the user agent require
to scroll horizontally. Moreover, what if we only want to focus on the content of the table that contains
the HTTP headers and not the full page?
How to take a screenshot of a certain subset of the page with Puppeteer
Instead of taking a screenshot of the full page, you can
use page.$ to retrieve a specific HTML element, here, the table that contains the values of the
HTTP headers (identified by the #headers id). Then, instead of using
page.screenshot , you can use the screenshot method on the
puppeteer.ElementHandle<Element> returned by page.$. This will scope the
screenshot only to this specific HTML element.
const headersTable = await page.$('#headers')
await headersTable.screenshot({ path: './vanila-headless-chrome.png' })
await page.screenshot({ path: './test-screenshot.png'})
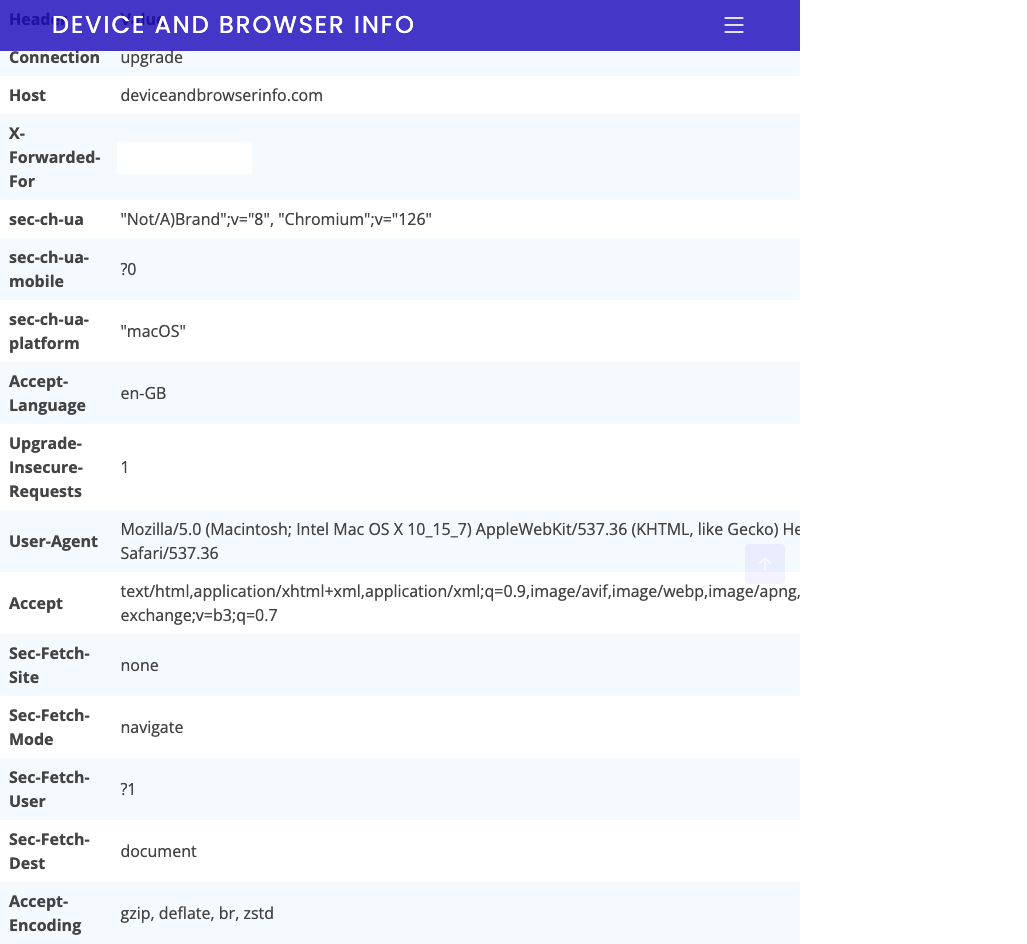
We obtain the following result, which is still not perfect as we see the menu at the top of the page and the user agent is not fully visible.
How to resize the page with Puppeteer?
To improve the quality of a screenshot, you may want to
resize the page using page.setViewport. Note that you should set the viewport before navigating
to the page.
const puppeteer = require('puppeteer');

(async () => {
    const browser = await puppeteer.launch();
    const page = await browser.newPage();
    await page.setViewport({
        width: 2560,
        height: 1440,
        deviceScaleFactor: 1,
    });
    await page.goto('https://deviceandbrowserinfo.com/http_headers');

    const headersTable = await page.$('#headers')
    await headersTable.screenshot({ path: './test-screenshot.png' })

    await browser.close()
})();
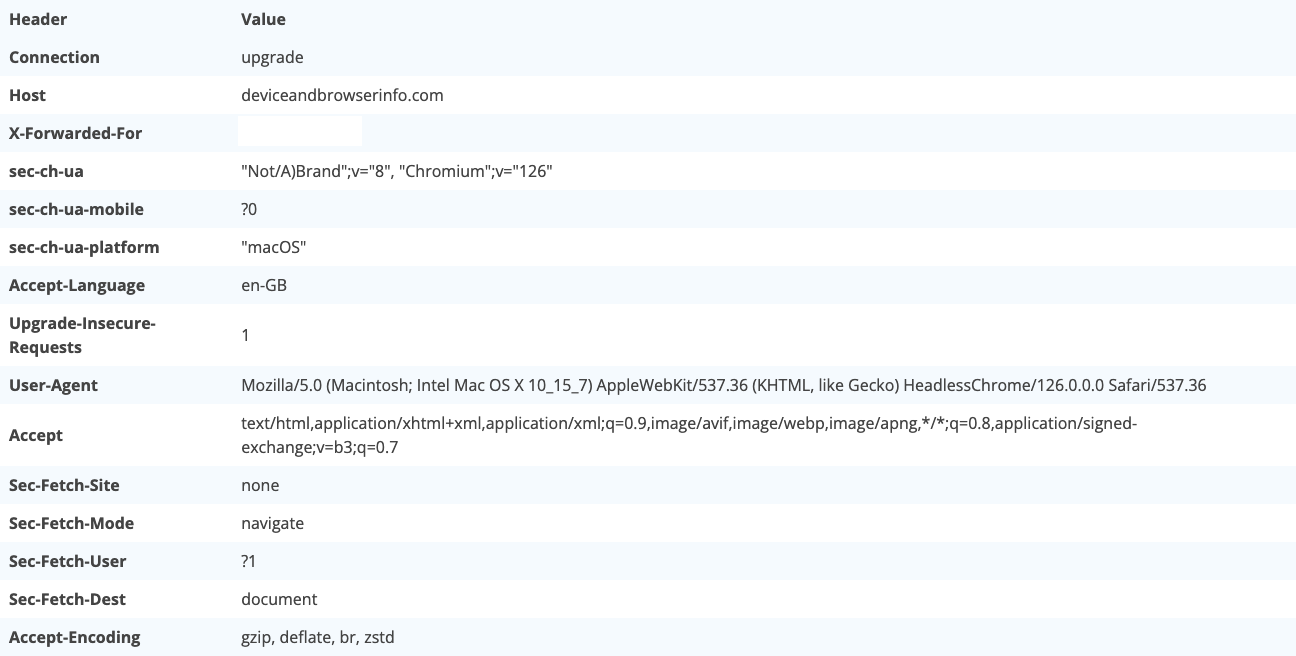
Once we combine the previous technique (taking a
screenshot on a specific HTML element) with page.setViewport to resize the page, we obtain a
better-looking screenshot that returns only the information related to the HTTP headers, without any other
external HTML elements.
In this article, we presented different options of the
page.screenshot , such as fullPage: true to take screenshots of a full page, that
can help you to take better-looking screenshots. Note that page.screenshot has other parameters
that we didn’t discuss in this article, such as omitBackground to hide the default white
background and allow capturing screenshots with transparency, or quality to control the quality
of the screenshot. You can read more about these parameters in the official Puppeteer documentation.