How to exclude bot traffic from Google Analytics 4
Google Analytics automatically excludes traffic from known bots and spiders, but what about bots that modify their user agent to avoid being too easily detected? This can be bots based on Puppeteer, Selenium, and Playwright with (headless) Chrome that scrape your websites or test the availability of your products. These bots may pollute your analytics data and skew key metrics such as the conversation rate.
In this article, we present how you can exclude bots, even when they change their user agents, from Google Analytics 4. We provide a simple solution that will catch most of the bots scraping and crawling your website, but you can go further by making the bot detection logic more complex.
The complete solution enables you to see the repartition of bot vs human traffic in Google Analytics 4. If you don’t care about it and just want to exclude bot traffic from Google Analytics, the most simple solution is not to insert/execute the Google Analytics script when you detect a bot. You can stop at step 1 if that’s the solution you’re looking for.
Step 1: Update your Google Analytics script
The remainder of the article provides a complete solution
to enable you to see the split of human vs bot traffic in Google Analytics 4. If you don’t care about it and
just want to exclude bot data from Google Analytics, the most simple solution is not to insert/execute the
Google Analytics script when you detect a bot. Thus, you could do the following (you can find more details
about cdpCheck1 in this section):
const isBot = cdpCheck1 || !!navigator.webdriver;
if (hasConsent() && !isBot) {
    // insert Google Analytics
}
// Otherwise we do nothing if we don't have the consent or if the user is a bot
If you're interested in seeing the repartition of bot vs
human traffic, you need to modify your JS Google Analytics script
to gather new user_properties that will detect the presence of bots, even when they lie about
their user agent.
Your Google Analytics script injection may look different,
but the principle remains the same. In my case, the insertion is wrapped in a function that verifies the
user consent first using hasConsent.
function insertGoogleAnalytics() {
    if (hasConsent()) {
        const scriptAsync = document.createElement('script');
        scriptAsync.async = true;
        scriptAsync.src = 'https://www.googletagmanager.com/gtag/js?id=G-DK35RXNBLH';
        document.head.appendChild(scriptAsync);

        const scriptInline = document.createElement('script');
        scriptInline.textContent = `
            window.dataLayer = window.dataLayer || [];
            function gtag(){dataLayer.push(arguments);}
            gtag('js', new Date());

            gtag('set', 'user_properties', {
                'cdpCheck': ${cdpCheck1},
                'webdriver': ${!!navigator.webdriver},
                'isBot': ${cdpCheck1 || !!navigator.webdriver}
            });


            gtag('config', 'G-DK35RXNBLH');
        `;
        document.head.appendChild(scriptInline);
    }
}
What matters in our case to detect bots and gather data is this part:
gtag('set', 'user_properties', {
    'cdpCheck': ${cdpCheck1},
    'webdriver': ${!!navigator.webdriver},
    'isBot': ${cdpCheck1 || !!navigator.webdriver}
});
We tell Google analytics to collect custom user
properties. Here, cdpCheck and webdriver refer to bot detection properties that I
discuss more in detail in another
article.
The code of cdpCheck looks as follows and
enables us to detect the most popular bots instrumented using Puppeteer, Playwright, and Selenium:
let cdpCheck1 = false;
try {
    let wasAccessed = false;
    const e = new window.Error();
    window.Object.defineProperty(e, 'stack', {
        configurable: false,
        enumerable: false,
        get: function () {
            wasAccessed = true;
            return '';
        }
    });
    // This is part of the detection and shouldn't be deleted
    window.console.debug(e);
    cdpCheck1 = wasAccessed;
} catch (_) {}
In our example, we consider that a user is a bot
(isBot) if the cdpCheck1 variable or navigator.webdriver are true.
You can add a more complex detection logic depending on your needs.
Step 2: Create a new custom dimension in the Google Analytics dashboard
Go to the Admin section of your Google
Analytics account.
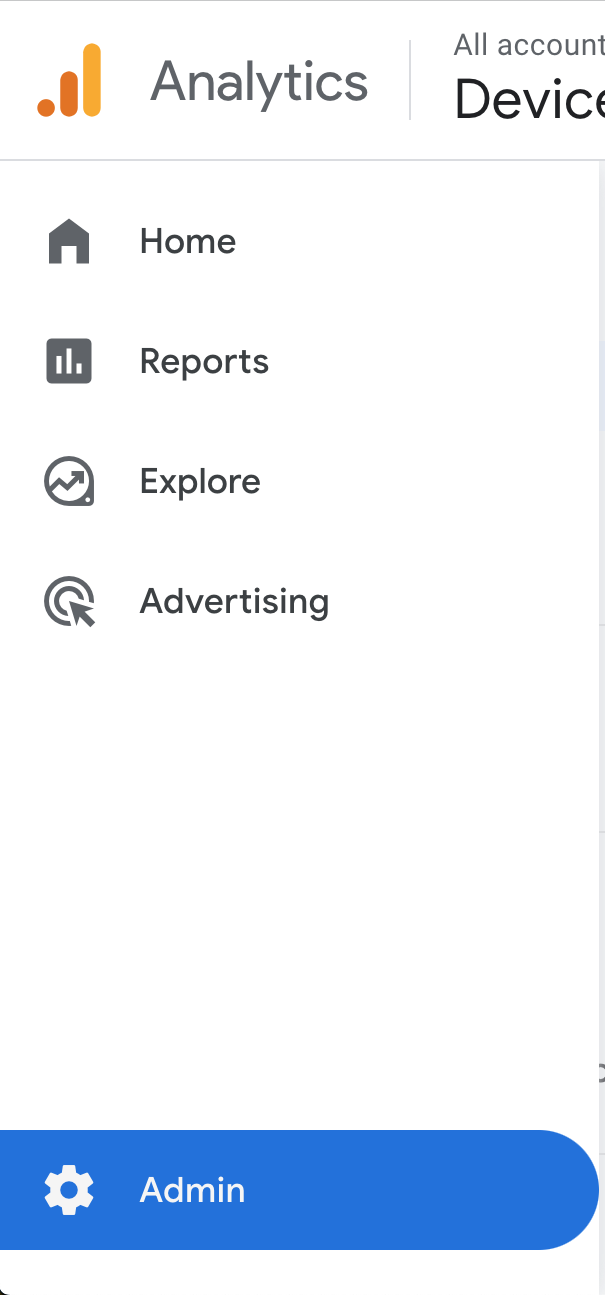
Then, under the Property settings section, go
into Data display and Custom definitions.

Click on the Create a custom dimension button
(blue button in the previous screenshot).
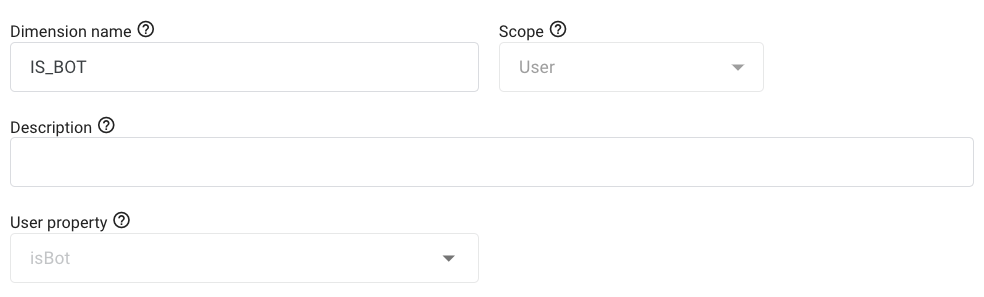
You need to provide the following information:
Dimension name: this will be the name used in Google Analytics. It can be whatever you want.
Scope: you need to selectUser.
Description: not mandatory, but you can provide a short explanation to describe the purpose of the dimension.
User property: must be the same value as theisBotattribute collected in the Google Analytics JavaScript code.
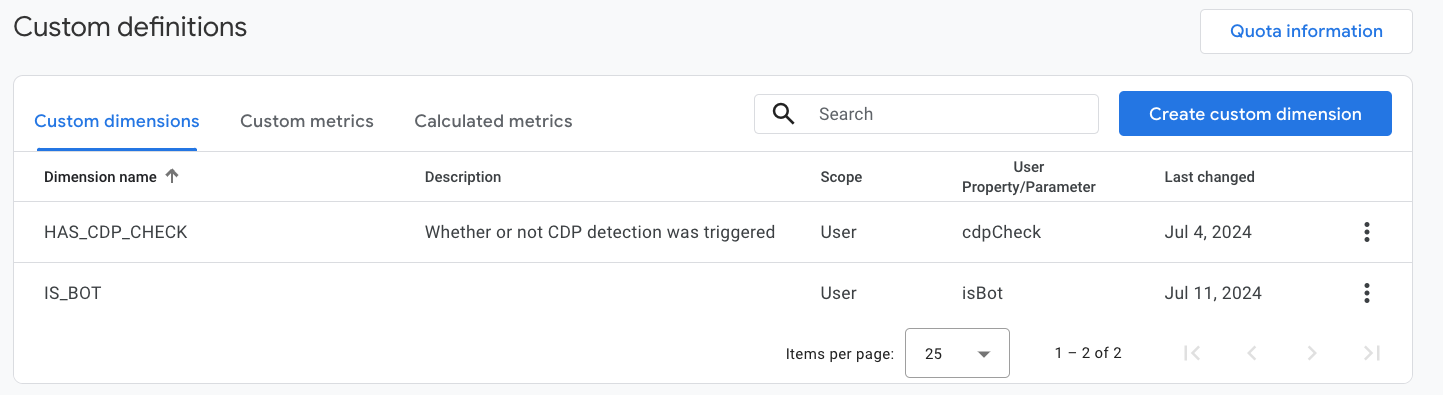
Once the dimension has been created, you should see it
listed in the Custom dimensions panel along with other existing dimensions.
Step 3: Create a new comparison in Google Analytics
Disclaimer: You may have to wait a few
hours before you can start using your newly created custom dimension. Once it is available, you can leverage
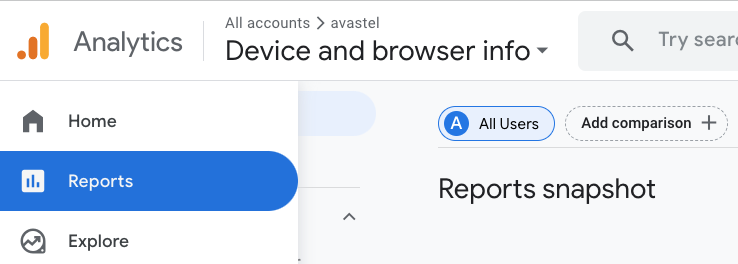
it as follows. First, go to the Reports section.
Then click on the Add comparison button (top
right of the previous screenshot) and click on + Create new.
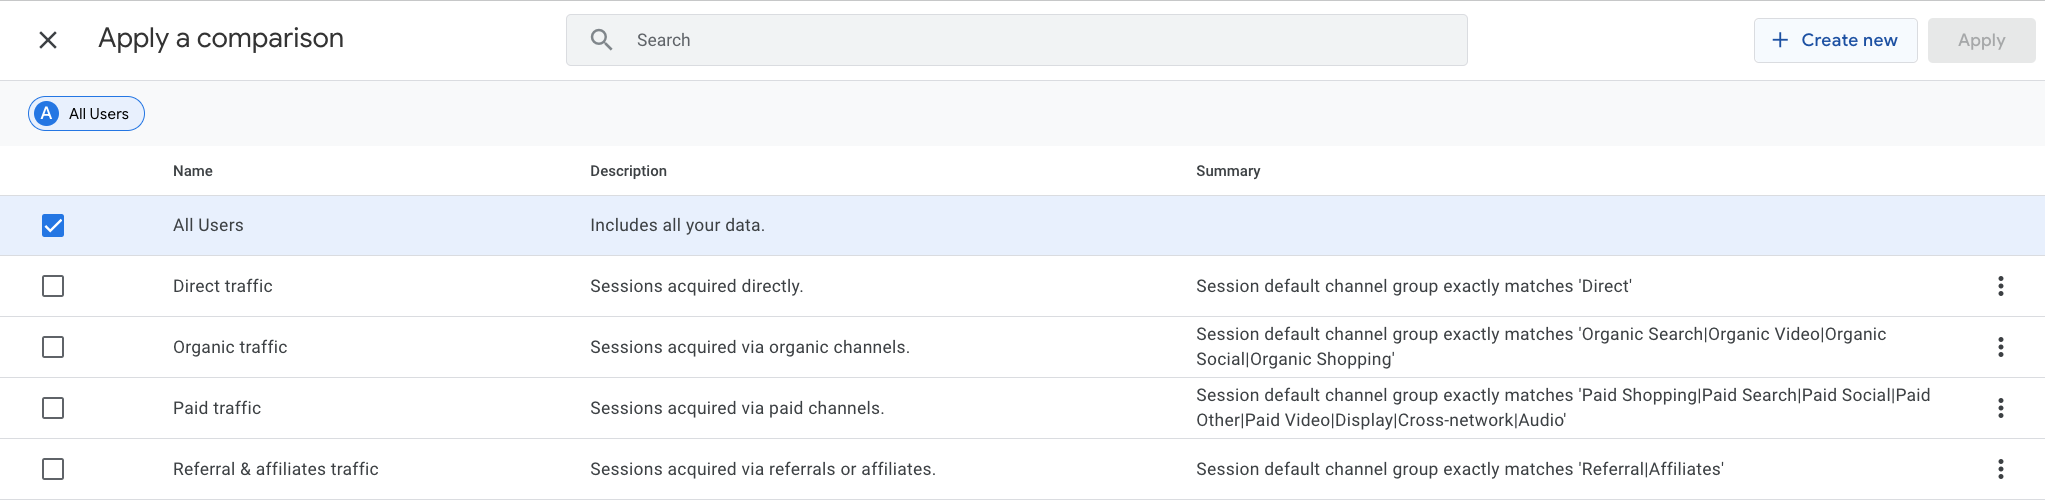
Here, you can select the IS_BOT custom
dimension created in the previous step.

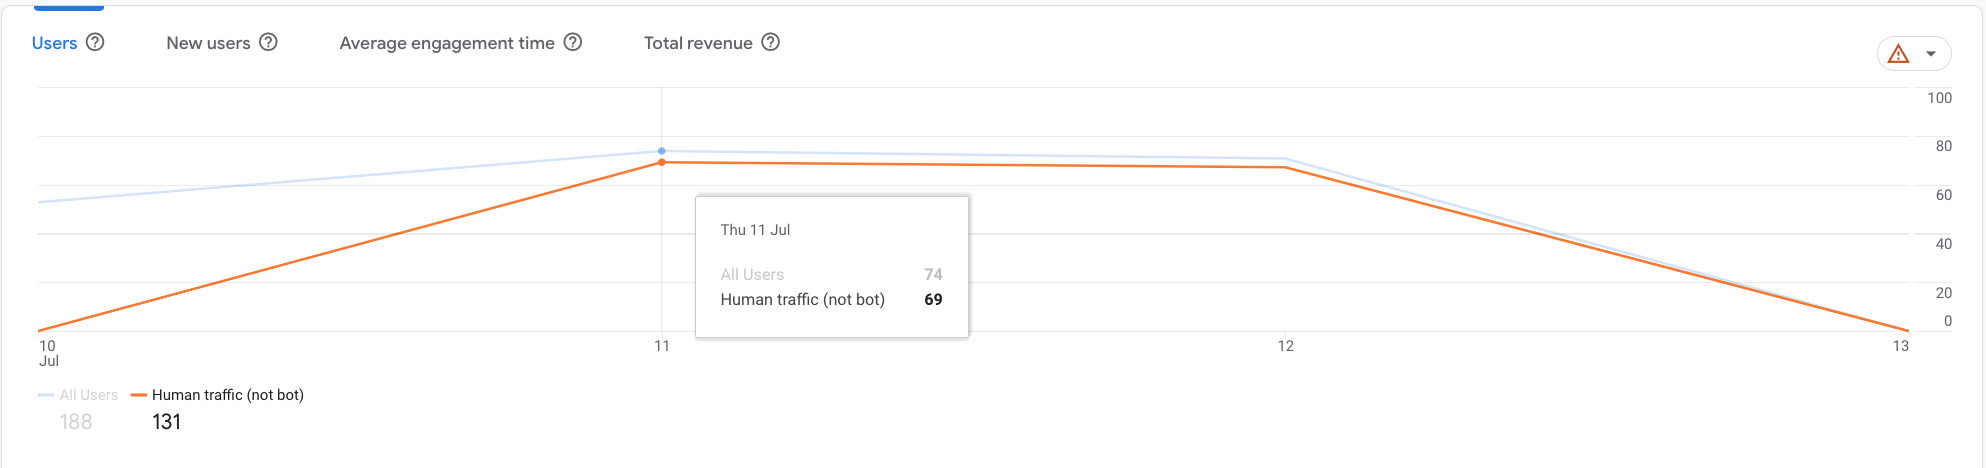
We select the traffic with IS_BOT = false to
focus only on human traffic. You could to the opposite, i.e. IS_BOT = true , to analyze the bot
traffic.
After the new comparison has been created, Google Analytics automatically updates your report. For each graph and section of the report, it either generates two graphs (1 for all traffic vs human traffic) or provides the details of all traffic vs human traffic as you can see on the graph below.